

Determining how to handle home security to protect your family is critical. After all, you don’t want to take risks when it comes to their safety. It’s an easy thing to put a lock on one door. But what about every door in the house? Every window? What if you need to handle security for the whole neighborhood? That’s when manual and DIY become unmanageable.
Snowflake database admins and data owners can run into the same issue with Snowflake Row-Level Security. While it may seem a simple task to set up one row access policy for one database using SQL in Snowflake, it quickly becomes overwhelming when you have hundreds of new users requesting access each week or thousands of rows of new data coming into your system daily.
In this blog post, we’ll explain what Snowflake Row-Level Security is and:
- Lay out the steps to set up Snowflake Row-Level Security policies manually using SQL vs setting up and managing these policies, with no code, in ALTR
- Provide examples of row-access policy use cases
- Show how using ALTR’s Row Access Policy feature can help minimize errors and make managing Snowflake row level security easier for anyone responsible for data security.
What is Snowflake Row-Level Security?
Snowflake’s row-level security allows you to hide or show individual rows in an SQL data table based on the user’s role. This level of security gives you greater control of who you’re permitting to access sensitive data. For example, you may want to prevent personally identifiable data (PII) held in rows in a customer table from being visible to your call center agents based on the customers’ address. By using our ALTR Row Access Policy feature you will save:
- overhead costs from having to hire multiple developers to handle the work,
- developer time to manually write code, and
- effort to make configurations correctly when you need to restrict access to individual rows within a table.
How Creating Snowflake Row-Level Security Policies Works if you DIY
What’s involved to create a row-level security policy in Snowflake:
- Who can do it: A software developer who knows how to manually write SQL code
- Length of time to complete successfully: Hours or even days each week because the developer will have to manually do-it-yourself (DIY)
Each of the steps below requires code reviews, QA, validation, and maintenance that must be done. These tasks can cause this to take weeks to complete for each unique row access policy.
1. Grant the custom role to a user.
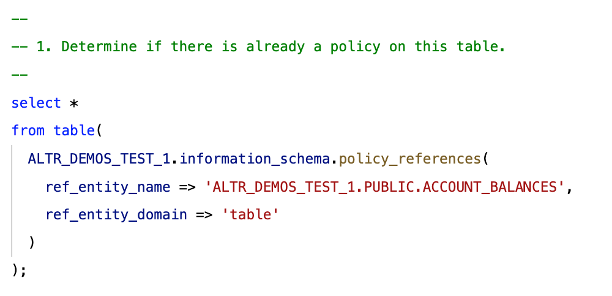
2. Write some code to determine if a table already has a row access policy defined.
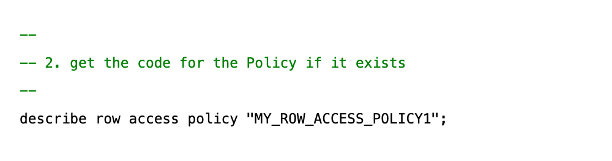
3. Write some code to get the original row policy code if it was already defined.
4. Edit the code (or write new code) to implement the row access policy.
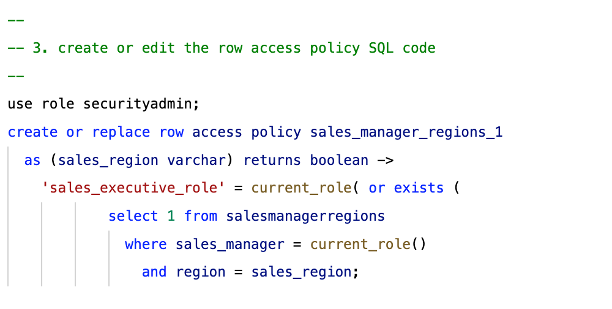
Step 4 is what will require most of your time because of everything that’s involved. For example, identifying all the criteria that could give a user access to a role, getting all department stakeholders to approve, turning those conditions into code, and having someone else to review that code and test it are all tasks to complete.
In addition, you’ll also need to make edits based on the code reviews and tests and constantly update the code each time the criteria changes.
How Creating Snowflake Row-Level Security Policies Works in ALTR
What’s involved to create a row access policy in ALTR:
- Who can do it: Anyone
- Length of time to complete successfully: Minutes because ALTR requires no code to implement and automates the security process
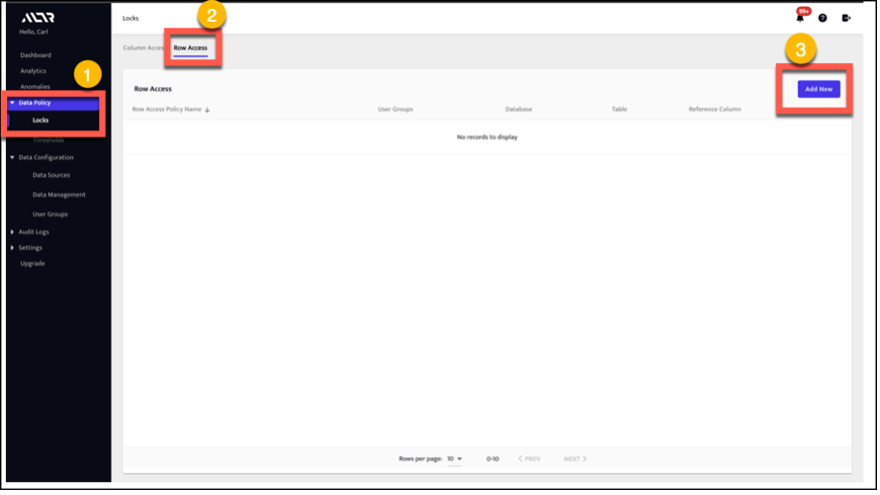
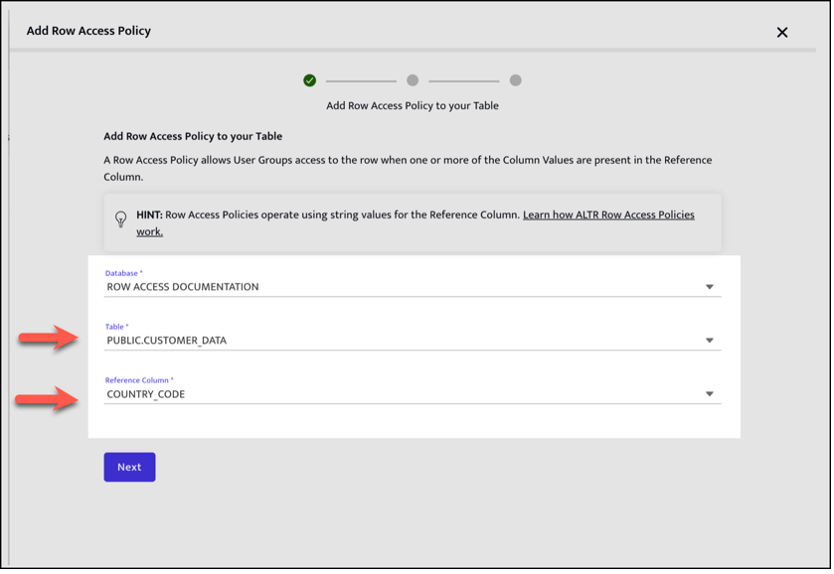
1. On the Row Access Policy page of our UI, select Add New.
This will allow you to specify the table that the Row Access Policy will apply to and the reference column that will control access.
2. Indicate which Snowflake roles can access certain rows based on the values in a column. To do this, specify the mappings between User Groups (Snowflake Roles) and column values.
3. Review your policy, give it a name, click Submit, and you’re done. The name will be displayed in ALTR to reference the Row Access Policy. ALTR will convert the Row Access Policy into Snowflake. In just a few seconds, ALTR will insert the active policy into Snowflake!
Snowflake Row-Level Security Use Cases
Here are a couple of example use cases where our Row Access Policy feature in ALTR can benefit your business as it scales with your Snowflake usage.
USE CASE 1. Using Row-Level Policies to Enable Regional Sales Views
You have sales data that includes records for sales in all your sales regions. You only want your sales managers to see the data for the regions that they manage.
USE CASE 2. Using Row-Level Policies to Enable Separate Data Sets
You run a SaaS business and your customers want a data set for report of their transactions in your product; however, all the transactions are in a single table — the SaaS way.
What you could be doing: Automating your Snowflake Row-Level Security Policies with ALTR
Do you or your team have hours in a day to spend manually writing SQL code every time you need to create a unique row access policy for hundreds or thousands of users? Do you want to have to increase overhead by hiring multiple developers to manually create row access policies and manage them? Do you want to have to spend hours trying to figure out why a Snowflake row-access policy is not working correctly and you’re getting error messages?
While you can still choose to go down the SnowSQL do-it-yourself route, why not work smart instead of hard? Why risk data breaches and regulatory fines? Safeguard your data to make sure that only the right people have the right access.
By now, you have a better understanding of how using ALTR’s no-code platform enables users who don’t need to know SQL to create and manage Snowflake row level security through a simple point-and-click UI
Watch the “how-to” comparison video below to see manually setting up your own Snowflake Row Access Security Policy versus doing it with ALTR.
Ready to give it a try? Start with our Free Plan today