

Have you ever walked into a store and noticed that while some items are displayed freely on shelves, some are visible, yet locked behind glass? We can guess that those items are higher quality, higher value, higher risk. It’s pretty clear when inventory comes into the store which items fit this category. It can be less clear when data comes into your database. That’s where data classification can help.
In this blog post, we’ll explain what data classification is, why data classification is an important step in your data security strategy, and how you would classify data yourself with SQL versus doing it automatically with ALTR.
What is Data Classification?
Data classification is the process of identifying the type of information contained in each column of your database and categorizing the data. This is an important first step to securing your data. Once you know the type of information contained in each column, you will be able to compare the type to a list of information types that your business considers sensitive. This in turn will make it possible to protect that data with appropriate data access policies. Before you create a column-level policy, you should classify it. By implementing data classification, you can minimize the risk of a sensitive data compromise.
Data Classification Factors
To protect your company’s sensitive data, you must first know what type of data you have. Therefore, data classification is a must to avoid having your data hacked by cybercriminals or leaked by individuals inside your business. To determine how to apply data classification consider the following factors:
- Timing: In order to enforce a data policy, you must know which columns contain sensitive data. So, you need to classify your data before implementing data access policies. You should also reclassify any time you add new sources of data.
- Methods: The method you use should involve sampling actual data values found in the data. Avoid relying completely on the name of the column.
- Automation: Classification can be tedious when done manually. A typical database will have hundreds if not thousands of tables, and each table can have hundreds of columns giving rise to missed columns and errors in copy/pasting results.
- What Data is Sensitive: Have a list of the information types that are sensitive in your situation. For example, what data security regulations apply to your company, what does your internal data security team require, and so on.
These factors will help to ensure that your data classification efforts are efficient and thorough.
How Snowflake Data Classification Works DIY
Read on to learn what’s required to classify data in Snowflake yourself with SQL via three different methods: good, better and best.
Who Can Do It: A software developer who can manually write SQL code AND categorize and manage data well
Downsides to manually classifying data in Snowflake:
- Time-consuming
- Higher risk of missing data that needs to be classified
- You’ll have to manually store your results in a database, making it difficult for non-technical users to analyze the results
1) “Good” Method: Column Name
This is a way to identify what type of data is in a column by looking at the column name. You can run a query that uses a conditional expression for each data type against the information schema inside of Snowflake.
The query result will display every column of data that matches your condition in your Snowflake account. The downsides are that you must run the query for every data type you want to identify, and you might miss columns that need to be identified if they weren’t named clearly. For example, if you’re trying to identify all columns of ‘email’ but it’s abbreviated as ‘eml,’ then it won’t be returned in your query.
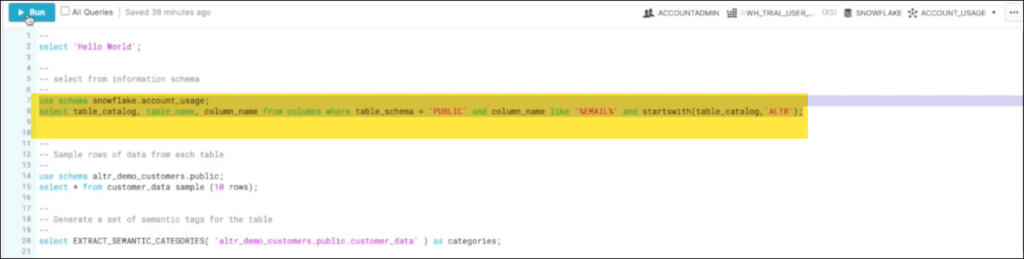

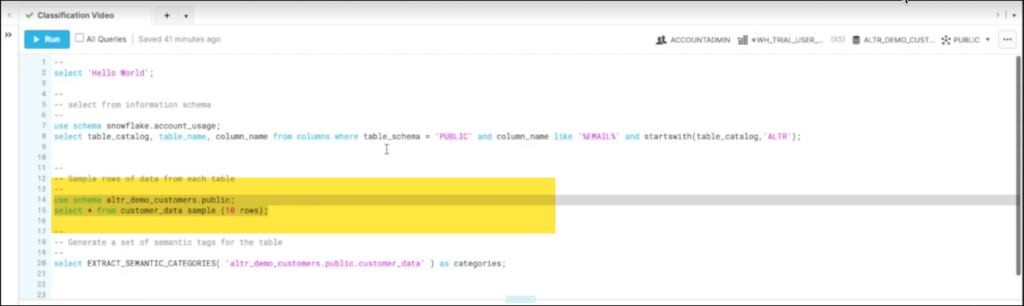
2) “Better” Method: Sample Rows of Data
This is better than the column name method because it will grab a sample of rows and then you can clearly see the content of each column. However, it’s still not the ‘best’ approach. Because the query will display multiple rows and column values for you to view, this can be time-consuming and overwhelming.

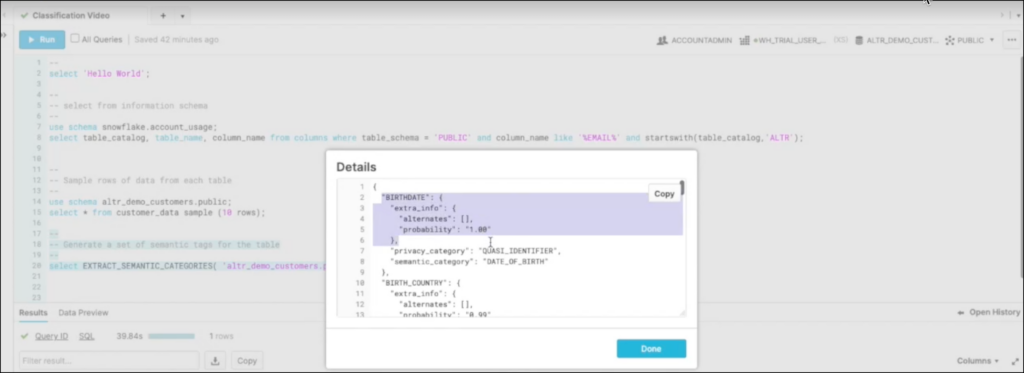
3) “Best” Method: Extract semantic categories
This data categorization method is the best one because it does the sampling for you. You can run extracted categories from a table and a JSON object with scored classification results will be generated in the query result. The caveats are that you must run this across each table in your database, and you must manually store and present results to use them to create access policies


How Snowflake Data Classification Works in ALTR
While you could choose one of the ‘good, better, and best’ approaches above to classify your data manually in Snowflake, using ALTR to automate data classification is the ‘supreme’ approach.
Who can do it: Anyone can do it and you don’t have to write SQL or log in to Snowflake.
Downsides to classifying data in ALTR: None
There are only four steps to ALTR Snowflake data classification.
- Simply choose the database that you’d like to classify (shown in figure 8).
- Check the box beside Tag Data by Classification.
- Choose from the available tagging methods.
- Click on Update. This starts the process of classifying all the tables in that database. When the job is complete, you’ll receive an email to let you know it’s done.
NOTE: An object tag is metadata (such as a keyword or term) that is assigned to a piece of information as a description of it for easier searchability. ALTR can use object tags assigned to columns in Snowflake to classify data or, if those or not available, ALTR can assign tags to columns using Google DLP classification.
The classified data results will be integrated into a Data Classification Report.

Snowflake Data Classification Use Cases
Here are a couple of use case examples where ALTR’s automated data classification capability can benefit your business as it scales with Snowflake usage.
Use Case 1. Protected health information
Your data team is integrating an employee dataset from a recently acquired hospital into your main data warehouse in Snowflake. You need to determine which database columns have healthcare-related data in them (e.g., social security numbers, diagnostic codes, etc.,). The original developers of the dataset are no longer available, so you use ALTR to classify the dataset to identify those sensitive columns.
Use Case 2. Financial records information from sales
You are a healthcare product manufacturer and you have just signed a new online reseller for your products. The resellers sales data will be dumped into your Snowflake database every week and will contain sales transaction data including addresses, phone numbers, and payment information; however, you don’t know where this data is located in the database.
What You Could be Doing: Automating Snowflake Data Classification with ALTR
In today’s world, implementing data classification as part of your company’s security strategy is critical. You can’t afford to put your company at risk of fines and lawsuits due to data breaches that could’ve been prevented. Do you or your security team have hours in a day to spend manually writing SQL code each time that you add data to your databases? Do you want to spend hours trying to figure out why a query didn’t generate any results due to unclear column names or other issues? We’ve made using ALTR such a convenience that you don’t even have to write any SQL code or log into Snowflake! It’s a simple point-and-click four-step procedure in ALTR and you’re done!
Watch the ‘how-to’ comparison video below to see what it looks like to manually classify Snowflake data versus automating it with ALTR.
Ready to give it a try? Start with our Free Plan today